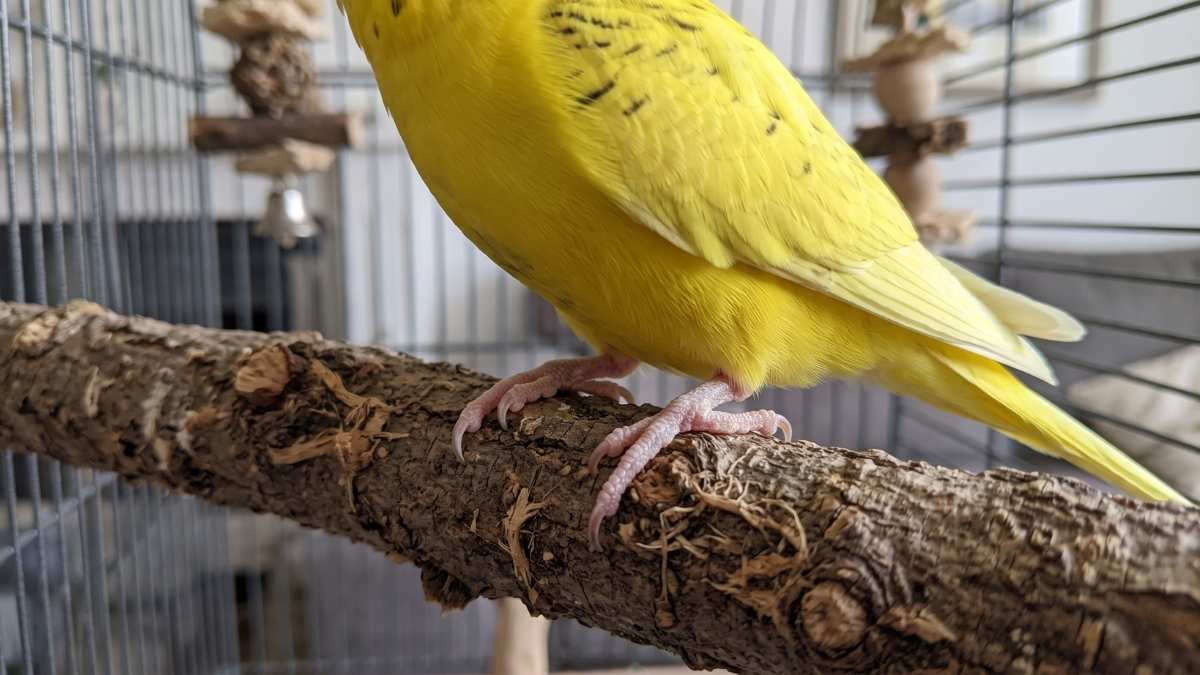
Learning how to trim budgie nails is one of the most practical grooming skills a parakeet owner can build, because overgrown claws affect how your bird perches, climbs, and rests. In a healthy budgie, the nails are naturally curved and tapered, sized so the toes can wrap securely around a perch. An overlong claw curls past that functional arc, sometimes into a near-hook, and forces the toe into an awkward angle that strains the joints over time.
How to Tell if Budgie Nails Need Trimming
Check your bird’s feet regularly, and look for these signs of overgrown claws:
- The flat standing test: Place your budgie on a flat, stable surface such as a tabletop or a book. A bird with healthy nails stands with its toes resting flat. If a toe lifts or the foot tips because the nail curls downward, the claw is too long.
- Catching on fabric: Nails that snag on your clothing, looped rope perches, or cage blankets are a common early warning. A snagged claw can twist the toe or cause a panicked struggle.
- Difficulty gripping perches: A budgie may shift its footing often, cling instead of perch, or struggle to hold a perch of its usual diameter.
Overgrown nails rarely appear overnight, so a quick weekly foot check lets you catch them early. Avian veterinary guidance generally treats nail length as part of routine husbandry, and your avian vet can show you the correct length during a regular wellness visit.
Understanding the Quick and Gathering the Right Tools
Every budgie claw contains a quick, the living core made up of a blood vessel and a nerve running down the center of the nail. Cutting into it causes pain and bleeding, so the goal is always to trim in the clear, hard tip beyond it.
- Light nails: In pale or clear nails, the quick may show as a pink line. Trim only the small, sharp tip beyond the quick, leaving a safe margin. If you are unsure where the quick ends, ask an avian vet to demonstrate the correct trimming technique.
- Dark nails: Pigmented nails can make the quick difficult to see, even when using a flashlight. If you cannot clearly identify the quick, remove only the very tip of the claw, or have an avian vet trim the nails. Never make a large cut when you are unsure where the quick ends.
Tools to Prepare Before Handling Your Bird
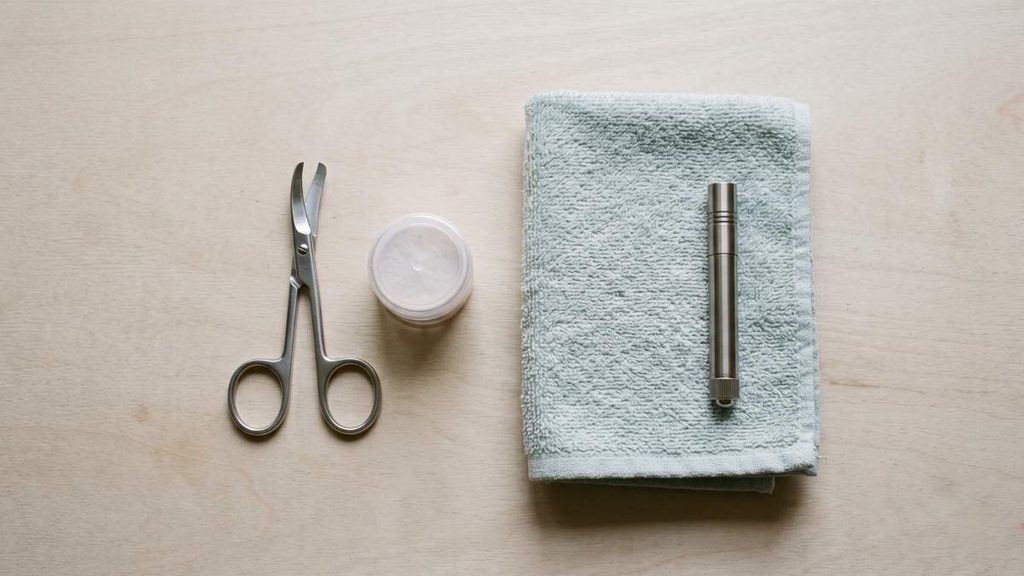
- Small pet nail trimmers or infant nail clippers: Scissor-style trimmers made for small birds give the most control.
- Styptic powder or cornstarch: Keep a styptic powder such as Kwik Stop within reach, or plain cornstarch or flour, to pack onto a minor bleed.
- A lightweight, clean hand towel: This supports gentle restraint without squeezing the chest.
- Good task lighting: A bright, steady light, plus the LED flashlight, lets you see each toe clearly.
Can You Use Human Clippers on Budgie Nails?
Standard human nail clippers may be too large for a budgie’s tiny claws, making precise trimming difficult. Some small clippers can be suitable when used carefully, but dedicated small-pet nail trimmers may offer better control. If you are unsure which tool to use, ask an avian vet to demonstrate a safe technique.
Keep your kit simple and purpose-made. Improvised tools, harsh chemicals, and adhesives such as superglue can seriously harm a bird, and our guide on what not to do with parakeets covers toxic substances and hazardous handling practices to avoid.
Step-by-Step Guide: How to Trim Budgie Nails Safely
Work calmly and keep the session short. A prepared, quiet routine matters more than speed, and stopping to let your bird rest is always acceptable.
- Set up a secure workspace: Close all doors and windows, switch off ceiling fans, and choose a small, quiet room in case your bird escapes your hold. Lay out your trimmers, styptic powder or cornstarch, towel, and flashlight within easy reach so you never have to leave the bird unattended or fumble mid-trim.
- Choose your restraint method:
- Two-person method (preferred): One person holds the bird while the other trims. The holder cradles the budgie in a lightly cupped hand, with the head gently steadied between two fingers and the body resting in the palm. This frees the trimmer to focus on one toe at a time.
- Single-person towel wrap: Drape the lightweight towel over your bird and wrap it loosely, leaving the head and one foot accessible. Birds breathe by moving the chest and keel, so never squeeze or compress the body. If the bird’s breathing looks labored or it opens its beak and pants, release it immediately and let it recover.
- Illuminate the nail and find the tip: Extend one toe gently and hold the LED flashlight behind it. Identify the quick, then locate the needle-sharp hook at the very end of the claw. That hooked tip is usually all that needs to go.
- Trim only the sharp tip: Position the trimmer so you can remove the smallest amount of nail while staying well clear of the quick. For overgrown budgie nails, avoid trying to shorten them substantially in one session. Trim only what you can safely identify, and leave any uncertain nail for an avian vet to assess.
- Reassure and release: Once finished, or if your bird becomes stressed, loosen your hold and return the budgie to its cage. Speak softly, offer a favorite treat, and watch for a few minutes to confirm it is perching normally with no bleeding.
Many owners find that learning how to clip parakeet nails is easier after one hands-on demonstration, and an avian vet or experienced groomer can provide it during a routine visit.
Emergency Response: What to Do if a Nail Bleeds
Even careful trimmers occasionally nick a quick. Stay calm, because a panicked handler tends to tighten their grip and agitate the bird, which raises its heart rate and can keep a small bleed flowing longer. Your steady voice and quick action matter most.
- Stop trimming and keep the bird secure: Hold the budgie gently, without squeezing the chest, and keep the affected toe still.
- Apply an appropriate clotting aid: If available, use a bird-safe styptic product carefully on the bleeding nail tip, following its instructions. Cornstarch may be used as a temporary alternative for minor bleeding. Prevent any powder from becoming airborne near your bird’s nostrils or mouth.
- Apply gentle, direct pressure: Use clean gauze to apply gentle pressure to the bleeding nail tip. Avoid rubbing or repeatedly checking the area, as this can disturb a forming clot. If bleeding is heavy or does not stop promptly, contact an avian veterinarian urgently.
- Move your bird to a quiet recovery space: Place the budgie in a cage with dim lighting and low perches, and keep the room calm. Check the nail after several minutes and confirm that the clot has held before resuming normal activity.
Birds are small, and blood loss that seems minor can matter quickly. Contact an avian veterinarian right away if bleeding has not stopped after a few minutes of pressure, if it restarts, or if the bird seems weak. Our guide on how to tell if a parakeet is sick explains how to recognize acute shock, a fluffed posture, lethargy, and other systemic signs that call for urgent care after an injury.
Most avian veterinary guidance treats persistent bleeding in a bird as a reason to seek professional help rather than wait and watch.
Preventing Overgrown Nails Naturally: Perch Selection
The best way to reduce how often you need to trim is a cage that keeps your budgie’s feet working all day. Varied perching wears the nail tips gently and builds foot strength at the same time.
Choose Natural Branches in Varied Widths
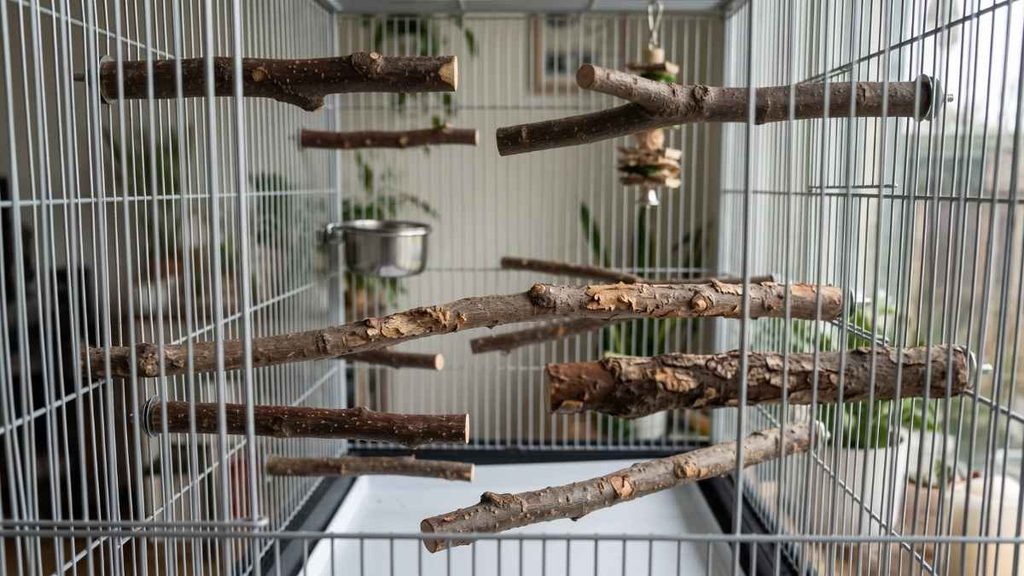
Offer several untreated wood perches of different diameters, such as manzanita, eucalyptus, and bird-safe fruitwoods like apple. Changing the width and the slight irregularities in the surface force the toes to grip at different angles. This exercises the foot muscles and helps wear the claw tips down naturally. Always rinse and dry branches thoroughly, and confirm the wood comes from untreated, pesticide-free sources.
Avoid Sandpaper Covers and Rough Concrete Perches
Sandpaper perch sleeves and abrasive concrete perches are often sold as nail filers, but they are a common cause of foot sores and pododermatitis, also called bumblefoot. Constant contact with a rough surface irritates the soft skin of the foot sole and can lead to painful, infected lesions. Avian veterinarians generally advise against using them as everyday perches.
Use Conditioning Perches Sparingly
A conditioning perch may help some birds, but its surface and placement matter. Mount it near the food dish or in another location where your budgie uses it for short periods, rather than making it the main sleeping perch. Your bird should have several comfortable natural-wood perches of different diameters, and you should regularly inspect its feet for redness, irritation, or sores.
Perch variety works best as part of a thoughtful layout, and our guide on where to put a budgie cage covers cage placement, comfortable perching arrangements, and safe environmental setups. Inspect the soles of your bird’s feet during each weekly check, and contact an avian vet if you notice redness, swelling, or scabs.
Sources & Veterinary References
- Association of Avian Veterinarians (AAV): Basic Care for Companion Birds (Grooming & Handling)
- Merck Veterinary Manual: Routine Care of Pet Birds (Nail Care)
Conclusion & Educational Disclaimer
With good lighting, gentle handling, and natural branch perches, claw maintenance can be simple and stress-free for both you and your budgie. Stay calm, trim only the needle-sharp tip, and keep sessions short. If you ever feel unsure, an avian vet or veterinary technician can perform a trim in minutes and show you the correct technique.
Educational Disclaimer: This article offers pet husbandry and grooming guidance only and is not veterinary medical advice. Consult a qualified avian veterinarian about your bird’s individual health concerns.